The Wild Beyond the Witchlight Review

Last updated: November 14th, 2022
A dark power grips the once whimsical Feywild realm of Prismeer. Can your players discover its source and return it to normal?

Table of Contents
What is The Wild Beyond the Witchlight?
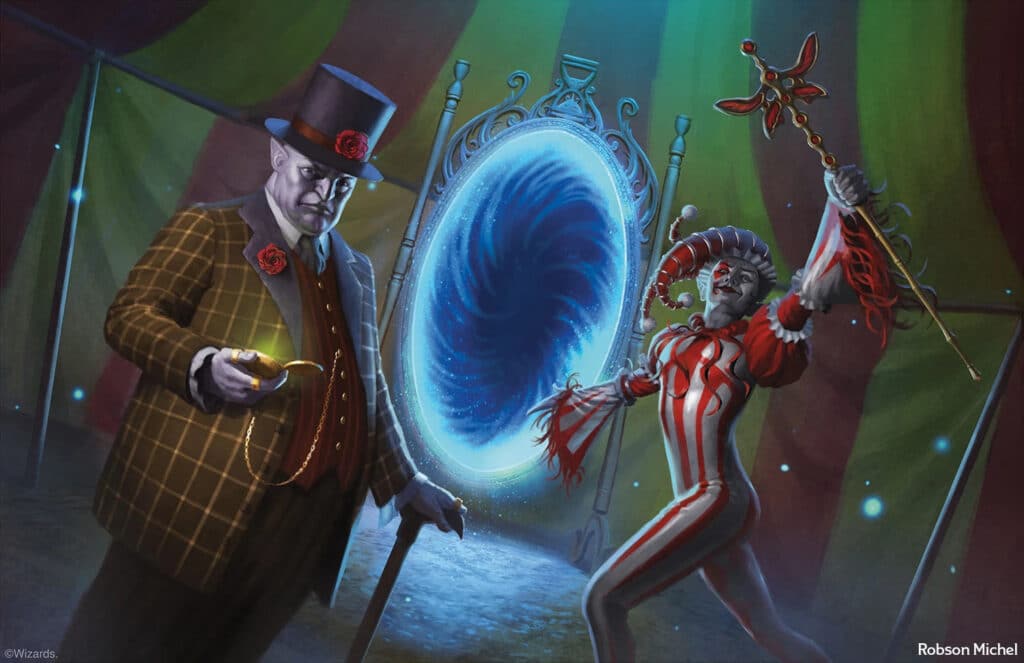
The Wild Beyond the Witchlight is a 5th Edition adventure module published by Wizards of the Coast that takes players from a circus on the Material Plane, called the Witchlight Festival, into the Feywild domain of Prismeer. The book was released on September 21st, 2021, is 256 pages long, and takes players from levels 1 to 8.
Quick Review (No Spoilers)

Pages: 256 pages
Published: September 21, 2021
Levels: 1 – 8
DM Difficulty: Medium
Player Difficulty: Medium
About
The Wild Beyond the Witchlight is a Feywild-centric adventure that takes players from a mysterious circus on the Material Plane into the whimsical plane of the fey. Once in the fey realm of Prismeer, they are tasked with figuring out the cause of a dark presence that has overtaken the realm.
In this adventure, players are rewarded for quick thinking and diplomatic discussions rather than solving disagreements with violence. The time spent in Prismeer is rife with impactful player choice, open-world exploration, and problem-solving. The fey inhabitants of Prismeer are colorful and have their own motives, making interacting with its denizens feel like they are actually alive rather than following a set script.
Interestingly, this adventure was said to come with a DM resource for creating Domains of Delight, different planes in the Feywild that are ruled over by powerful fey creatures, and Archfey, the rulers of the aforementioned Domains of Delight. This didn’t make it into The Wild Beyond the Witchlight but is available for purchase on DMs Guild here: Domains of Delight.
Pros
- This module goes to great lengths in order to provide alternatives to combat or secret weaknesses of powerful NPCs when combat is necessary. These can be easily overlooked, but once players get in the right mindset they will begin to think differently about how to approach encounters.
- The module takes an open-world, sandbox-style approach to its design. This is made very apparent by the fact that players don’t necessarily have to go anywhere or do anything. The main limiting factors of this open-world playstyle are the NPC guides that take the party between areas of Prismeer.
- The main villains of the story don’t have a negative predisposition towards the party. In fact, the party can complete the entire adventure without fighting any of them. While this may seem anticlimactic to some groups, I like that success in this adventure is based on completing a goal rather than defeating a BBEG.
Cons
- There is a lot of importance placed on a certain item that is randomly assigned to a location in the gameworld before you start the adventure. While the campaign can be completed without the item, it is mentioned as the only way to undo a powerful curse. Players that miss the arbitrary hiding spot of the item can be frustrated by the fact that it seems exceptionally important yet is very difficult to find.
- There aren’t a whole lot of combat opportunities without “going against the story”. The module seems to want players to reason and investigate their way to what they want. If your party is looking for a fight, they could be put off by the seemingly docile nature of the carnival.
- The module can have quite a few things to remember. The player’s interactions throughout the campaign have a significant impact on events that occur. Luckily, the module includes a “story tracker” that allows you to note down the outcome of these pivotal decisions.
- Disappointingly, this module only takes players up to 8th level. While I hoped that the Feywild would include higher-level combat threats, the module focuses on non-combat resolutions. Taking it beyond the 10th level would have left a lot of player abilities unused.
In-depth Review (Spoilers Ahead!)
Introduction
The introductory chapter sets the stage of the adventure and provides some character options and random tables to help run the game.
The new player options that are introduced are:
- Two new character backgrounds: the Feylost (for characters who grew up in the Feywild) and the Witchlight Hand (for characters who work at the Witchlight Carnival).
- Two new races: the fairy, a small fey creature with the ability to fly, and the harengon, a race of humanoid rabbits.
The Good
Multiple Plot Hooks
Providing two different fleshed-out plot hooks allows for the players to feel more tied into the story. Each of the plot hooks is referenced throughout the adventure. In my opinion, the Lost Things plot hook is more fun.
Story Tracker
The Story Tracker is an amazing concept and one that will be very helpful in a campaign with as many moving pieces as this one.
Character Options and Advancement
There are two new backgrounds, the Feylost and Witchlight Hand, and two new races, Harengon and Fairy, introduced in this module. All of these options are flavorfully styled to Feywild tropes and don’t seem unbalanced, with the potential exception of the Fairy race (discussed below).
Interestingly enough, this adventure comes with “modularized character advancement”. This is done by leveling the players up every time they do one of the following:
- Enter a new domain
- Encounter a hag (and survive)
- Free the realm (at the end of the adventure)
While this is fairly similar to milestone-based level advancement, I find it cool that the module isn’t afraid to lock levels behind the player choices and the adventure’s outcome.
Troves of Trinkets
There’s a strong emphasis on trinkets in The Wild Beyond the Witchlight. Players are constantly finding or trading non-magical items throughout the adventure, so the list of 100 items in the introduction helps to make sure that they don’t get boring and repetitive.
The Bad
Fairy Trouble
Some DMs don’t like character options that provide a flying speed at 1st level as the Fairy race does. Combine that with the fey creature type and the fairy appears to be quite a strong option off the hop.
Weak Plot Hooks
The Lost Things plot hook randomly assigns important items to a certain location. If the lost things are improperly spread out so that some important areas don’t hold any items, it can cause a lack of motivation throughout the campaign. Also, with the exception of the Unicorn Carousel in Chapter 1, the players are never told who has the items the party is looking for.
The Warlock plot hook boils down to the classic, “go here, do this, and you get {insert x item} in return”.
If I were to choose between the two, I would probably choose to run the Lost Things plot hook. Players may still need some additional help figuring out that their lost items are in the Feywild during Chapter 1, and may need an extra push to help save Zybilna in Chapter 5.
Chapter 1

In this chapter, the party is introduced to the Witchlight Carnival and sets their adventure in motion. This introductory chapter provides the party with a baseline of what to expect in the Feywild: fun and quirky encounters, rules of hospitality and politics, and a sense that everything is not quite right.
The Good
Carnival Games
The carnival events are wonderfully fun and can have lasting impacts on the story. My favorite event by far is the cupcake eating competition which has an engaging mechanic and can lead to a beneficial item. Plus, “custard damage” is a hilarious concept.
Shifting Moods
Each encounter can influence the overall mood and atmosphere, creating meaningful consequences to seemingly insignificant encounters. I love that the atmosphere of the whole carnival can take a dark turn, signified by eerie, discordant music.
The Bad
Confusing Formatting
Between the list of carnival attractions, NPC descriptions, interactions with said NPCs, and timed events, this chapter becomes quite the jumble. My suggestion would be to have the carnival events listed on a separate screen or document so they can be easily referenced when running this portion of the adventure.
Vague Goals
When entering the carnival, players don’t really know that they are looking for a portal to the Feywild. There is a lot of talk about “something greater going on behind the scenes” but this really only applies to the Warlock plot hook, while the Lost Things plot hook neglects this information to some extent.
The culmination of the player’s time in the carnival leads them to the carnival owners, and even they don’t provide a distinct reason to go searching for the lost things in the Feywild.
At the end of the chapter, they have thrown in a catch-all. If the players don’t know what to do next, an NPC literally takes them to the place and tells them exactly what to do. I think this was required because of how loose the clues in this chapter ended up being.
Chapter 2

Once the party finds the portal to the Feywild hidden in the Witchlight Carnival, they arrive in Hither, a dank swamp filled with all sorts of mischief and mystery. The swamp is home to a band of rabbitkin bandits, dangerous bog creatures, and pompous Bullywogs. It is ruled by Bavlorna, one of the three hag sisters that have taken over the realm.
While traversing the swamp, players will learn what it means to deal with the fey and will figure out that diplomacy will get them a lot farther than violence.
The chapter starts off with the player’s landing in Hither, where they are given a lay of the land and can see a hot air balloon crash in the distance. This event is meant to set players on the outlined path where they meet NPCs and experience events in the order they were “meant to occur”. If players decide to strike out without following the provided adventure hook, there is still ample opportunity to integrate the preplanned encounters of the module, or you could simply skip them. There are very few events or encounters that need to happen in this module. The recommended path of this chapter is as follows:
- The party discovers Sir Talavar, a Faerie Dragon trapped in a cage, who directs them to Telemy Hill in search of a goblin who has the key to his cage.
- The party goes to Telemy Hill and learns of how dangerous bargains with hags can be from the cursed goblin, Jingle Jangle.
- The players are directed to a group of bandits by Jingle Jangle who will be able to provide them information about Downfall, the location of the first hag sister, Bavlorna.
- The party arrives in Downfall where they become involved in the sinister plots of noble Bullywogs. At the centre of the city lies the cottage of Bavlorna, where the party will meet the hag and negotiate for the lost items (or further information about the current state of Prismeer).
The interesting thing about Bavlorna is that she isn’t hostile to the party. In fact, as long as players are polite and non-threatening, she is more than willing to work with them and provide what they are looking for.
The Good
Down the Rabbit Hole
The swamp of Hither is as delightfully wacky as you could expect a location in the Feywild to be. The party will encounter rabbit thieves, posh frogmen, and plenty of rhymes, riddles, and secrets.
Alternate Encounter Goals
Many of the situations have a solution other than violence. Even if it comes to blows, there is usually a way to outsmart or find the weak point of an opponent.
Sandbox-Style Fun
The layout of Hither is open-ended and purposefully ambiguous. DMs are encouraged to shift the landscape and inconvenience the players during their travels because that’s just what the Feywild does.
The locations laid out in the chapter can work in a sandbox-style, though if the players make a beeline for Downfall they could be woefully unprepared for the weirdness of what’s going on in the bullywog city. This chapter does a good job of describing the ideal path for the characters to follow, as well as providing interesting random encounters to make traveling the magical swamps more whimsical.
The Bad
The Downside of Downfall
The last location of this chapter, Downfall, has a fairly unnecessary plotline of Bullywog insurrection. Upon arrival, the players are directed (quite heavy-handedly) towards seeing the Bullywog King. The Bullywog King then asks the party to join his ranks. If they refuse, he throws them in prison. Escaping capture isn’t particularly difficult but it can end up feeling like a railroad to players that want more autonomy.
I like the city and the fetch quests that are eventually required to take place (as long as the players want to parley with Bavlorna) but I think that the agenda of the Bullywogs is forced too heavily from the minute players arrive at the city.
Deadly Encounters
There are a couple of instances where the players can get absolutely crushed if they aren’t careful. One encounter is the Awakened Trees at Telemy Hill, the second is Big Barkless in Downfall.
The Awakened Trees at Telemy Hill are CR 2, with the potential for 10 Trees being thrown at the party. That said, the party would have had to play the situation quite poorly in order to end up in a very dangerous situation. The Big Barkless encounter, however, is an easy trap to fall into and can easily wipe out a 2nd-level party.
Also, if the players are following the “Warlock’s Quest” plot hook, they may get it into their heads that they need to kill each of the hags. Without knowing Bavlorna’s weakness, there is absolutely no way a party of level 2’s could take on the CR 7 Bavlorna. If the players are heading for that conclusion, it is important to show them the warning signs of how powerful this hag is.
Moving On
As is sometimes the case with more open-style adventures, it can be unclear what the party’s next move is supposed to be. If the players didn’t make the deal with Bavlorna to steal the painting from her sister in Thither, there isn’t a whole lot of direction for the players to make that move. Fixing this will definitely depend on what is motivating your party, but it could be as simple as a “ping” from a lost thing in the direction of Thither.
Coming up with a plot hook for the Warlock’s Quest is a bit trickier. The party is only pushed towards the next area by the hag Bavlorna. If she is killed before this information can be gathered, the party may be at a loss for what to do next.
Chapter 3

After the party departs the swamps of Hither, they will arrive in the enchanted forest of Thither. This “forest level” is full of tricksy fey magic, including candy-obsessed goblins, a magical lake with a unicorn guardian, and a band of children waging war on a hag.
This chapter follows the same formula of the second chapter. It is an open sandbox that suggests a specific sequence of events and ends at the second hag’s lair. The chapter also provides offers a number of random encounters to provide challenges when needed, just like the Hither chapter. The suggested series of events of this chapter are as follows:
- The party encounters an old man who has been cursed by the second hag sister, Skabatha. He directs the party to Will of the Feywild, a youth that is wanted by Skabatha for causing her grief.
- When the party meets Will and his young band of rebels, the Getaway Gang, he will tell them of a plan to infiltrate Skabatha’s lair and rescue the children she has captured. He will also tell them of a lake that is guarded by a unicorn, Lamorna, who may know the secret to the hag sister’s defeat.
- The party then travels to the unicorn’s lake where they learn the truth behind what happened to the realm of Prismeer. The players are also introduced to the secondary villains, the League of Malevolence, during this chapter.
- With the information the unicorn has provided and help from Will, the party makes their way to Loomlurch, Skabatha’s hideout, where they are pushed to rescue the Skabatha’s captives. Here they meet a member of a band of adventurers that are committed to helping save the realm of Prismeer. They can also deal with Skabatha, whether that means killing her or bargaining for the items/knowledge they seek.
The Good
Clarity from a Unicorn
The encounter with Lamorna at the Wayward Pool helps provide a lot of context to the final stage of the adventure. While hints are dropped here and there throughout the story, talking with Lamorna will make sure the party has tangible information about what awaits them at the Palace of Heart’s Desire
Treehouse Heist
The meeting with Will and the Getaway Gang provides a great reason to explore Skabatha’s Lair with deception and stealth rather than brute force. This, combined with the carefully laid out daily schedule of Skabatha, can make scouting out Loomlurch and planning the heist a very satisfying experience.
Rescuing the children is a great secondary objective and encourages the party to explore Loomlurch beyond the primary objective.
Meeting with a Hag
I love that the characters are encouraged to sit down with Skabatha in order to reach a mutually beneficial agreement. Not only will it allow for a chance to roleplay an important NPC, but being offensive and breaking rules of hospitality can lead to a very disadvantaged encounter on the party’s part.
The Bad
Hard to Find Guide
Finding Squirt, the guide that will lead the party to the last hag in the region of Yon, is dependent on the party asking the Getaway Gang (or acquiring a random oil can out of their treehouse). While you can always railroad the party into finding Squirt, there’s a good chance it won’t happen organically.
Chapter 4

Once the party has finished up in Thither, they will find themselves in the mountainous region of Yon. Yon is a sparse, bleak realm that doesn’t have as much whimsy as the previous two realms. This realm is ruled over by Endelyn Moongrave, a wicked witch that can gaze into the future and is obsessed with grim theatrical plays.
Again, this chapter provides a recommended path, some random encounters, and a conclusion at the lair of the last hag sister. The path of this chapter goes as follows:
- The party is approached by a down-on-her-luck elf and her giant Dandelion friend. They tell the party that there are a group of creatures called korreds here that may help to overthrow the hag.
- When the party goes to investigate their potential ally, they are told of the group’s hatred for another clan of creatures, called the brigganock, that are supposedly loyal to the hag. If the party can deal with the brigganock for the korred’s, they will help them fight the hag.
- On the way to deal with the brigganock, the players come across an elf trying to make his way out of the Feywild and back to his home plane. With the help of the party, he manages to escape.
- When the party arrives at brigganock’s lair, they quickly realize that this group doesn’t support the hag’s agenda either. If both groups are made to realize that their interests align, they will help the players assault the hag’s lair together.
- The party heads to the hag’s lair and has to bargain with the hag or overthrow her.
The Good
Strength in Numbers
The side quest of uniting the korreds and brigganock is a satisfying one as it pays off with an ally in the fight against the hag as well as a secret entrance to her lair.
Tragic Comedy
When the players meet with the hag, she will only give them what they want if they put on a play for her. The mechanics behind the play are a fun improv exercise that could be a really good time if you can get your players into it.
The Bad
An Unexpected Exit
If players light the torches at the Fey Beacons area and jump through the portal they could be stranded in the Material Plane with no way to reach the Feywild again. Of course, this can be adjusted to prevent the adventure from ending preemptively.
Stage Fright
The play that the players are required to put on requires effort on the player’s part to be outgoing and think quickly. If players are uncomfortable roleplaying or have trouble thinking on their feet, they can easily become discouraged by the mechanics of this encounter.
Chapter 5

The final chapter of the adventure sees the players finally arrive at the heart of Prismeer, the Palace of Heart’s Desire. Here they must navigate a magical castle where most of its inhabitants are frozen in time.
While navigating the castle, the party must avoid the remaining members of the League of Malevolence and a dangerous Jabberwock. In order to free Prismeer from the grip of the hags, the party must investigate clues to find the true identity of the Queen of Prismeer. If the party succeeds in freeing the Queen from her prison, the party is (potentially) awarded with a Wish spell.
The Good
Just in Time
I really like the mechanics that stem from most of the castle’s inhabitants being frozen in time. It adds another dimension (heh) to exploring the castle and provides a great reason for the party to investigate the issues that have befallen the realm, rather than simply being told.
Satisfying Payoffs
This chapter does a great job tying off threads of the story that have been left open until now and pays off mysteries that have been hinted at throughout the adventure. Really, the culmination of this adventure isn’t about a big battle or defeating an evil being hell-bent on conquering the world. Rather it is about investigation, puzzle solving, and diplomacy in order to succeed. This is a nice change from typical adventures, but ones that players should be prepared for it so as to not provoke feelings of “wait, that’s it?”
The Bad
An Anticlimactic Ending
When the Queen is freed from her prison, it is said that all the remaining hags travel to another dimension to hide from her wrath and that the adventure doesn’t cover the scope of what the alternate dimension may entail. This is certainly a disappointing conclusion to the story if revenge is the primary motivation and puts a lot of pressure on DMs to come up with an actual conclusion to the story.
Finding a Horn in a Haystack
Throughout this chapter, it is mentioned many times that the horn of a unicorn can undo time freezing effects that are holding the inhabitants of the castle prison. If the players didn’t happen upon the unicorn horn (which is extremely likely, considering the random places it could be) they may be confused as to how to actually resolve the issue in front of them. It is only mentioned by one NPC that another item, the Flametongue Sword carried by one of the League of Malevolence members, can be used to end the time freezing effects. Even then, going about the task in this way can upset the Queen and cause her to scold the party rather than reward them.
Puzzling Puzzles
Exploring the palace relies on a mechanic wherein the players find a crown and have to switch it between a stag and a lion statue to open different doors. While I can appreciate this “Zelda-esque” dungeon puzzle, it doesn’t really work in D&D and just seems like a waste of time that will frustrate the party.
Also, there is a puzzle that is required to be solved before using the crown to open doors. If the players guess wrong, the ability to use the crown is completely taken away, thus locking away a ton of exploration opportunities. I found this to be quite a strange choice and would personally run a combat encounter if the players guess wrong, rather than locking away a huge chunk of the map.
What’s the verdict?
All in all, I really liked this adventure. I think that it reads and plays differently than just about any other official adventure released for the 5th Edition.
That said, I think that this adventure is particularly “table dependent”. If your table is really focused on combat and prefers a grindier session involving battlemaps, miniatures, and rolling dice, then they will likely have trouble with the vague, whimsical nature of this module.
Even if your table loves roleplaying, exploration, and puzzles, I would still want to be upfront with them and let them know that this adventure actively looks down on combat in most circumstances. That way, players don’t show up with optimized combat builds and can have more fun in their character creation by purposefully choosing “suboptimal” character choices that are more about utility than fighting.
You will love this module if:
- You want something that breaks the typical 5th Edition formula.
- You like roleplay, exploration, and puzzles.
- You want a chance to play quirky, suboptimal builds without putting yourself at a massive disadvantage.
- You are okay following vague goals and going with the flow of the adventure.
You won’t love this module if:
- You want straightforward direction for what to do and where to go.
- You want a gritty setting.
- You love combat.
- You want high-level play.
You can buy The Wild Beyond the Witchlight at your local game store, Amazon, or on D&D Beyond.
Related Posts

Wasted Wizard Product Spotlight: Stackable DnD Condition Rings
We brought Wasted Wizard’s stackable condition rings to our weekly D&D game to see how well they streamlined combat. Here’s our full review!
Friday November 21, 2025
EBONWOOD Product Spotlight: Tidal Focus Dice Set and D&D Accessories
EBONWOOD sent over a few of their latest tabletop accessories for us to try out—here’s how they held up in a real D&D session.
Wednesday August 6, 2025
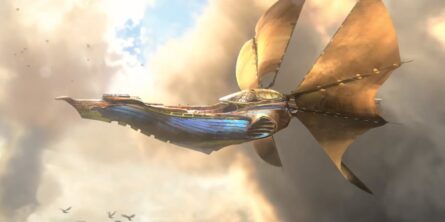
Essentials for Airships in D&D
Take to the skies! Discover airship history, mechanics, and free battlemaps to bring high-flying adventures to your D&D campaign.
Tuesday May 27, 2025
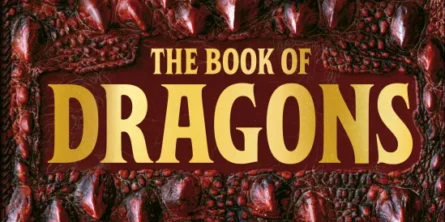
The Book of Dragons: A New Book on Dragon Lore is Coming Summer 2025
Discover The Book of Dragons, a stunning D&D lore book packed with dragon art, anatomy, and myth coming August 2025.
Friday May 23, 2025
Or follow us on Instagram, Twitter, and YouTube.
Thanks for the well written review.
Thanks, hope you enjoy the book!
Thanks for this great review. This campaign looks like it could be perfect for my group of 10yo kids, with whom I’ve been running adventures for the past year (a mix of written-for-kids, homebrew and adult adventures with a few more things behind ‘veils’ for age appropriateness). Any thoughts on that?
As long as your kids are well-versed in the dangers of D&D (character death is a possibility in this adventure) this seems like an amazing adventure for a younger table1
Thanks for the reply. Are you saying it’s more of a possibility than normal? Or in ways that are trickier for the DM to proactively head off? As a returning 1e/2e player, I think death should always be a possibility! But maybe not for ten year olds.
Definitely not more of a possibility than normal. I’d say this adventure has a much less chance of player death than previous adventures.
Great review, thanks a lot for going into so much detail.
I’m quite intrigued about this adventure. I like the apparent quirkiness of the setting and the NPCs. That said, I’ve never had a good experience following a pre-written adventure.
Since it’s sandbox in nature, and has these mini-worlds, would you say it would be easy to buy it and steal the interesting parts (encounters, mini-settings, NPCs, factions, puzzles) and adapt to other settings?
I would say it is one of the best adventures to “steal the interesting parts” from. The worlds are quite separate from one another so you could run one or part of one without much trouble. The carnival and each of the worlds also have a lot of interesting module encounters that can be lifted and used for your own settings.